Ad Blocker Detected
Our website is made possible by displaying online advertisements to our visitors. Please consider supporting us by disabling your ad blocker.
In this article, you will explore the essential techniques required to master the art of cooking with a Dutch oven. Whether you are a seasoned chef or a beginner in the kitchen, this versatile and durable cooking vessel provides endless possibilities for creating flavorful and impressive meals. From slow cooking to baking, braising to frying, we will guide you through the fundamental techniques that will allow you to harness the full potential of your Dutch oven and elevate your culinary skills to new heights.
Choosing the Right Dutch Oven
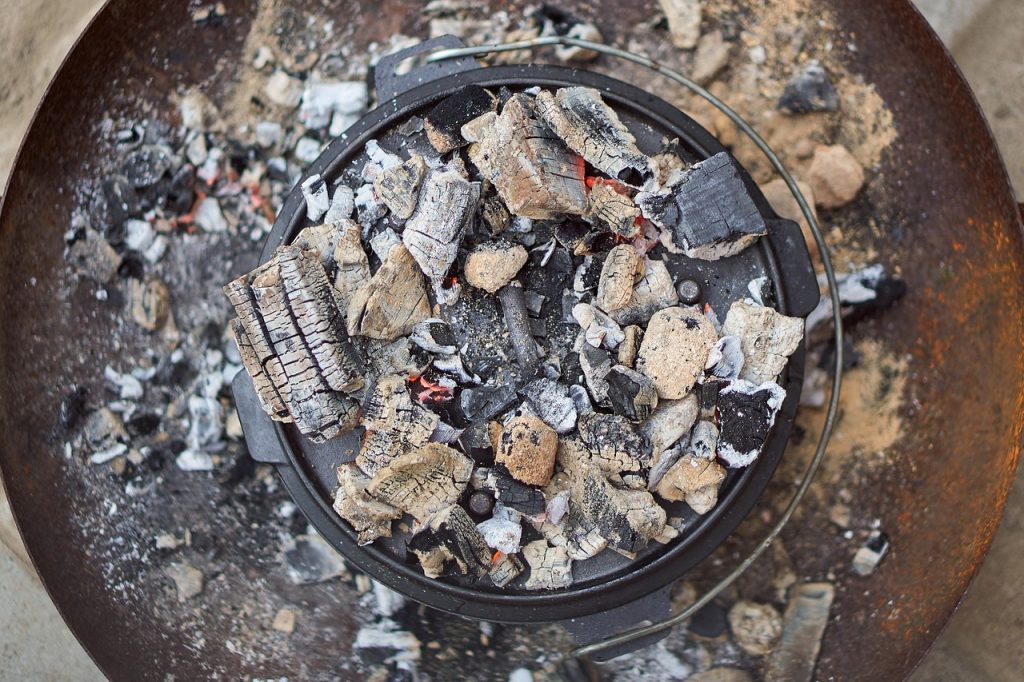
A Dutch oven is an essential piece of cookware for any kitchen. When selecting a Dutch oven, there are a few factors you should consider to ensure you choose the right one for your needs.
Consider the Size and Capacity
The size and capacity of the Dutch oven will determine how much food you can cook in it. If you frequently cook for a large family or often host gatherings, a larger Dutch oven with a higher capacity will be more suitable. However, if you primarily cook for yourself or a smaller household, a smaller Dutch oven may be sufficient. Keep in mind that a Dutch oven with a larger capacity may be heavier and take up more space in your kitchen.
Select the Right Material
Dutch ovens are typically made from two main materials: cast iron and enameled cast iron. Cast iron Dutch ovens are known for their excellent heat retention and distribution, making them ideal for slow cooking and baking. On the other hand, enameled cast iron Dutch ovens are easier to clean and require less maintenance since they are coated with a layer of enamel. Consider your cooking preferences and needs when deciding between the two materials.
Check for a Secure Lid
A secure lid is vital for keeping the heat and moisture inside the Dutch oven while cooking. Look for a Dutch oven with a tight-fitting lid to ensure that proper heat retention is maintained throughout the cooking process. A poorly fitting lid can lead to inconsistencies in cooking and may result in longer cooking times or unevenly cooked food.
Seasoning and Preparing the Dutch Oven
Before using your Dutch oven for the first time, it is crucial to properly season and prepare it. Seasoning helps to create a non-stick surface and prevents rust from forming on cast iron Dutch ovens.
Wash and Dry the Dutch Oven
Begin by washing the Dutch oven with warm, soapy water to remove any dirt or dust. Use a gentle scrub brush or sponge to clean the interior and exterior of the Dutch oven. Once cleaned, thoroughly dry the Dutch oven to prevent rust.
Apply a Layer of Oil
After the Dutch oven is dry, apply a thin layer of oil to the interior and exterior surfaces. Use an oil with a high smoke point, such as vegetable oil or grapeseed oil. This layer of oil will help to prevent food from sticking to the Dutch oven during cooking.
Bake the Dutch Oven
Place the oiled Dutch oven upside down in a preheated oven and bake it at a high temperature, typically around 400°F (200°C). Bake the Dutch oven for about an hour to allow the oil to polymerize and create a smooth, non-stick surface. After baking, allow the Dutch oven to cool completely before using it for cooking.
Using the Dutch Oven on Stovetop
The Dutch oven is incredibly versatile and can be used on various heat sources, including stovetops. Here are some tips for using your Dutch oven on the stovetop.
Adjust Heat Levels
When using the Dutch oven on the stovetop, it is important to adjust the heat levels accordingly. Start by heating the Dutch oven on medium heat and gradually adjust the heat as needed. A Dutch oven retains heat well, so you may need to reduce the heat slightly compared to other cookware.
Use Low to Medium Heat
To prevent scorching or burning of food, it is recommended to use low to medium heat while cooking with a Dutch oven on the stovetop. The thick walls of the Dutch oven distribute heat evenly, allowing for gentle and even cooking of your ingredients.
Avoid High Heat and Rapid Temperature Changes
Although Dutch ovens are built to withstand high temperatures, it is best to avoid using excessively high heat on the stovetop. Rapid temperature changes can cause thermal shock and may lead to cracking or warping of the Dutch oven. It is advisable to let the Dutch oven heat gradually and cool down naturally to ensure its longevity.
Cooking with the Dutch Oven in the Oven
The Dutch oven is not limited to stovetop cooking; it is also an excellent tool for cooking in the oven. Here are some guidelines for using your Dutch oven in the oven.
Preheat the Oven
Before placing your Dutch oven in the oven, make sure to preheat the oven to the desired temperature. This allows the Dutch oven to heat evenly and ensures consistent cooking results.
Choose the Right Temperature
When cooking with the Dutch oven in the oven, it is essential to select the appropriate temperature for your recipe. Follow the recipe instructions or refer to a reliable cooking guide to determine the ideal temperature for your dish. The Dutch oven’s excellent heat retention will help to maintain a steady temperature throughout the cooking process.
Use Oven Mitts for Handling
Remember that the Dutch oven becomes extremely hot when used in the oven. Always use oven mitts or pot holders when handling the Dutch oven to avoid burns. Ensure that you have a safe surface, such as a heat-resistant trivet or cooling rack, to place the hot Dutch oven on when removing it from the oven.

Using the Dutch Oven for Baking
The Dutch oven is a wonderful tool for baking bread, cakes, and other baked goods. Here are the steps to follow when using your Dutch oven for baking.
Preheat the Dutch Oven
Just as you would preheat your regular oven, it’s essential to preheat your Dutch oven for baking. Place the Dutch oven, with the lid on, in the oven and allow it to preheat along with the oven to ensure consistent heat distribution during baking.
Prepare the Dough or Batter
While the Dutch oven is preheating, prepare your dough or batter according to your recipe. Once your dough or batter is ready, remove the preheated Dutch oven from the oven using oven mitts.
Bake According to Recipe Instructions
Carefully transfer your dough or batter into the preheated Dutch oven, ensuring not to burn yourself. Then, place the lid back on the Dutch oven and return it to the oven. Follow the recipe instructions regarding baking time and temperature to achieve the best results. The Dutch oven’s tight-fitting lid helps create a moist environment, resulting in beautifully baked goods.
Simmering and Slow Cooking with the Dutch Oven
The Dutch oven is the perfect vessel for simmering soups, stews, and slow-cooked meals. Follow these techniques for achieving the best results with your Dutch oven.
Low and Consistent Heat
Simmering and slow cooking require a low and consistent heat source. The Dutch oven’s thick walls and tight-fitting lid help to retain heat and maintain a steady temperature. Adjust your stovetop or oven to the lowest possible setting while still maintaining a gentle simmer or slow cook.
Tend to the Dish Occasionally
While simmering or slow cooking with a Dutch oven, it’s important to give the dish occasional attention. Stir the contents of the Dutch oven from time to time to ensure even heat distribution and avoid sticking or scorching of food at the bottom.
Adjust Cooking Time as Needed
The cooking time for simmering and slow cooking recipes can vary depending on the ingredients and desired tenderness. Keep an eye on your dish and adjust the cooking time as needed, ensuring that the flavors develop and the ingredients cook to perfection.
Browning and Searing Meats
The Dutch oven is an excellent tool for achieving a beautiful sear and golden-brown crust on meats. Follow these steps to master browning and searing with your Dutch oven.
Preheat the Dutch Oven
To achieve a proper brown and sear on meats, it is crucial to preheat the Dutch oven before adding the meat. Heat the Dutch oven on medium-high or high heat, depending on the thickness of the meat and the stovetop you are using.
Add Oil or Butter
Once the Dutch oven is preheated, add a small amount of oil or butter to the hot pan. Swirl the oil or melt the butter evenly to coat the bottom of the Dutch oven, ensuring that the entire surface has a thin layer of fat.
Sear the Meat on High Heat
Carefully place the meat in the hot Dutch oven, ensuring that each piece has enough room to brown without overcrowding the pan. Allow the meat to sear undisturbed for a few minutes on each side until a golden-brown crust forms. Avoid moving the meat too early, as this can hinder the browning process.
Using the Dutch Oven for Deep Frying
While deep frying may not be the first technique that comes to mind when using a Dutch oven, it can be an effective and efficient way to cook a variety of foods. Follow these guidelines for safe and successful deep frying with your Dutch oven.
Use a Thermometer
Maintaining the proper oil temperature is crucial when deep frying. Use a reliable food thermometer to ensure that the oil reaches and stays at the desired temperature throughout the frying process. This will help prevent undercooked or overly greasy food.
Choose the Right Oil
Selecting the right oil for deep frying is essential. Opt for oils with a high smoke point and neutral flavor, such as vegetable oil, peanut oil, or canola oil. These oils can withstand high temperatures without deteriorating and will not impart any unwanted flavors to your food.
Monitor and Adjust Heat
When deep frying with a Dutch oven, it’s important to monitor the heat of the oil continually. Adjust the heat source as needed to maintain a consistent oil temperature. Fluctuations in oil temperature can result in unevenly cooked food and oily or greasy results.
Cleaning and Maintaining the Dutch Oven
Proper cleaning and maintenance of your Dutch oven will ensure its longevity and optimal performance. Follow these steps to clean and maintain your Dutch oven effectively.
Allow the Dutch Oven to Cool
After using your Dutch oven, allow it to cool down completely before cleaning. Placing a hot Dutch oven in cold water or subjecting it to rapid temperature changes may cause warping or cracking.
Remove Food and Residue
Once the Dutch oven has cooled, remove any leftover food or residue. Use a non-abrasive sponge or brush to gently scrub the Dutch oven, ensuring that you remove any stuck-on food particles. For stubborn stains or residue, you can soak the Dutch oven in warm, soapy water before scrubbing.
Avoid Harsh Scrubbing
While it is important to clean your Dutch oven thoroughly, avoid using abrasive cleaners or harsh scrubbing brushes. These can damage the seasoning or the enamel on the Dutch oven’s surface. A gentle touch is all that is needed to keep your Dutch oven clean and in good condition.
Storing the Dutch Oven Properly
Proper storage of your Dutch oven is essential to preserve its quality and prevent any damage. Follow these guidelines for storing your Dutch oven.
Ensure it is Dry
Before storing your Dutch oven, make sure it is completely dry. Moisture can lead to rust or mold formation, so it is important to ensure the Dutch oven is thoroughly dried before storing it.
Use Paper Towels or Cloth
To prevent moisture buildup, you can place a layer of paper towels or a clean cloth inside the Dutch oven when storing it. This will help absorb any residual moisture and keep the Dutch oven dry.
Store with Lid Slightly Open
To prevent any unpleasant odors or moisture buildup, it is recommended to store the Dutch oven with the lid slightly open. This allows for air circulation and helps to keep the Dutch oven fresh and odor-free.
In conclusion, a Dutch oven is a versatile and essential tool in any kitchen. By following the above techniques and guidelines, you can make the most out of your Dutch oven and achieve delicious results in your cooking and baking endeavors. From selecting the right Dutch oven to proper cleaning and storage, these tips will ensure that your Dutch oven remains a reliable and cherished piece of cookware for years to come.
